AI-Generated Article
This content has been automatically generated using artificial intelligence technology. While we strive for accuracy, please verify important information independently.
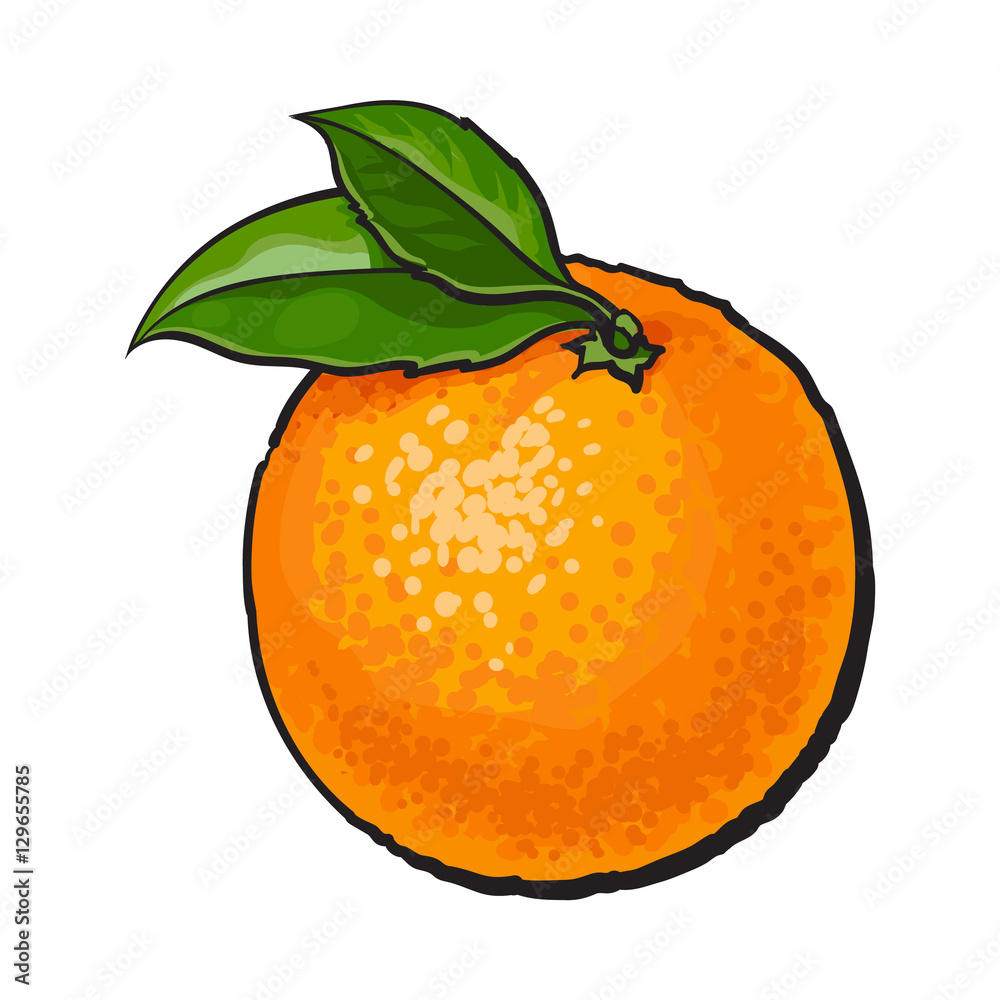
There is something truly wonderful about putting pencil to paper, particularly when you are trying to capture the simple joy of an everyday item, like, you know, a bright, cheerful orange. It is a fruit that, frankly, just seems to radiate happiness, and learning how to put that feeling onto paper can be a really rewarding experience for anyone, whether you are just starting out with art or perhaps looking for some fresh ideas. This guide is here to walk you through making your own citrus creation, showing you how to draw an orange with straightforward directions that anyone can pick up and follow.
You might be thinking that drawing something that looks like the real thing, or even a fun cartoon version, is a bit tricky, but honestly, it is not as hard as it might seem. We have got some really easy ways to get started, from getting the basic shape down to adding those little touches that make your drawing pop. It is all about taking things one small move at a time, and pretty soon, you will have a picture that you can be proud of, which is that kind of accomplishment that feels really good.
So, if you are a young person just beginning to explore art, or maybe an adult who wants to pick up a pencil again for some creative fun, this article is for you. We will go over simple methods that help you create an orange picture, from the initial outlines to putting in the colors and even making it look three-dimensional with some clever shading. It is about making art accessible and enjoyable for everyone, basically, giving you the tools to draw a lovely orange with ease.
- Evie Sundress
- Felix Et Heidi Stoll Date
- 22 Hair Salon %E6%98%8E%E5%88%A9
- Raspberry Clothing
- Finca La Carrodilla
Table of Contents
- Getting Started with Your Orange Drawing Adventure
- What Supplies Do You Need for Your Orange Drawing?
- How Do You Begin an Orange Drawing- Setting Up the Basic Shape?
- Adding Color to Your Orange Drawing- Bringing it to Life
- Making Your Orange Drawing Look Real- Highlights and Shading
- Different Ways to Approach Your Orange Drawing- Whole, Sliced, or Fun?
- Tips for Making Your Orange Drawing Easy for Young Learners
- Where Can You Find More Orange Drawing Inspiration?
Getting Started with Your Orange Drawing Adventure
Starting a new drawing project, particularly with something as familiar as a piece of fruit, can be quite a pleasant way to spend some time. It is about getting comfortable with your tools and seeing how simple shapes can turn into something recognizable. For many, the idea of creating an orange drawing might bring up thoughts of complex lines or tricky shadows, but that is not really the case here. This guide focuses on breaking down the process into small, manageable steps, making it approachable for almost anyone who wants to give it a try. You will find that even if you have not drawn much before, or if it has been a long time since you picked up a pencil, these simple directions will help you create something you are happy with. It is, you know, about building confidence as you go.
The beauty of drawing an orange is that it is a common object, so you probably have a good idea of what it looks like already. This makes it easier to spot when your drawing is getting close to the real thing. We will be looking at how to get that round shape just right, and then how to add the little details that truly make it an orange. It is, in a way, like learning to ride a bike – you start with the basics, and then you gradually add more complex moves as you get more comfortable. So, get ready to discover just how simple and satisfying creating an orange drawing can be, which is pretty exciting for a beginner.
What Supplies Do You Need for Your Orange Drawing?
Before you even make your first mark, it is helpful to gather a few simple things. You do not need anything too fancy or expensive to get a good orange drawing going. A basic pencil, perhaps one that is not too dark like an HB or a 2B, is a good start for sketching out your initial shapes. This kind of pencil lets you make light lines that you can easily erase if you need to adjust something. You will, of course, also want a good eraser, because, you know, everyone makes a few corrections along the way, and that is perfectly fine. A clean, white piece of paper is also pretty important; it gives you a fresh surface for your creative ideas.
- Stefanie Mannaerts
- Berkshire Lane
- %D8%BA%D8%B2%D8%A7%D9%84 %D8%B1%D8%AC%D8%A8%DB%8C%D8%A7%D9%86
- Erin O Keefe
- Kanin Club Menu
If you are planning to add color to your orange drawing, then you will want to have some coloring tools ready. Crayons are a great choice, especially for younger artists, as they are easy to hold and provide bright, solid color. Colored pencils are also a really good option, as they let you blend colors and create more subtle effects, which is kind of nice. Markers can give you a really bold look, too, if that is what you are going for. The main thing is to pick something you feel comfortable using, something that allows you to express the warm, sunny color of an orange. So, gather your materials, and you will be ready to begin your artistic work.
How Do You Begin an Orange Drawing- Setting Up the Basic Shape?
When you are starting your orange drawing, the very first thing to think about is its overall form. An orange, typically, is round, so beginning with a simple circle or a slightly oval shape is the best way to go. Do not press too hard with your pencil at this stage; you want your lines to be light and easy to change. Think of this as just a rough guide, a place to put your main idea. You can sketch a few circles if you need to, just to find the one that feels right for the size and general appearance you want your orange to have. It is, like, the foundation of your whole picture.
Once you have a light circle on your paper, you can begin to refine it a little. Oranges are not perfectly smooth spheres; they often have a bit of an irregular outline, maybe a slight bump here or there, or a flatter spot where they might have rested. You can add these small imperfections to make your orange drawing look more natural. Just gently adjust the circle you have drawn, making it a little less perfect, which is, in some respects, what makes it interesting. You might also want to add a tiny stem at the top, or a small indentation where the stem would have been, just to give it more character. This early stage is all about getting the general outline down before you add any more details, and it is pretty important for the final look.
Adding Color to Your Orange Drawing- Bringing it to Life
After you have your basic orange drawing shape sketched out, the next really fun part is adding color. This is where your orange truly starts to come alive on the paper. When you are thinking about the color of an orange, it is not just one solid shade; there are often variations, some parts might be a bit brighter, others a little deeper in tone. You can start with a general orange color and then, you know, build it up gradually. If you are using crayons or colored pencils, you can press a little harder in some areas to make the color more intense, and lighter in others for a softer look.
Think about where light might be hitting your orange. Those areas would be lighter, perhaps even a bit yellow-orange. The parts that are in shadow, on the other hand, might have a touch of red-orange or even a very light brown mixed in to give them a bit more depth. You do not have to be a professional painter to do this; just experiment with layering different shades of orange, yellow, and perhaps a tiny bit of red. This simple step of adding varied color can make your orange drawing look much more vibrant and realistic, and it is actually quite satisfying to see the transformation.
Making Your Orange Drawing Look Real- Highlights and Shading
To make your orange drawing really pop and look like it could roll right off the page, adding highlights and shading is a pretty key step. Highlights are those bright spots where light is directly bouncing off the surface of the orange. These are usually the lightest parts of your drawing, maybe even left white if you are using white paper, or a very light yellow if you are coloring. Think about where the main light source is coming from in your imaginary scene, and place your highlight there. It is often a small, curved spot on the brightest side of the orange, you know, like a little sparkle.
Shading, on the other hand, is about showing the darker areas where light does not reach as much, or where the orange casts a shadow. This helps to give your orange drawing a sense of roundness and depth. You can use a slightly darker shade of orange, or even a touch of brown or a very soft gray, to create these shaded areas. The darkest part of the shadow will usually be opposite the highlight, and also underneath the orange where it meets the surface it is resting on. By carefully adding these lighter and darker areas, you can make your flat drawing appear three-dimensional, which is, honestly, a cool trick.
Different Ways to Approach Your Orange Drawing- Whole, Sliced, or Fun?
When it comes to creating an orange drawing, you are not limited to just one way of showing it. You can, for instance, draw a whole orange, which is what we have mostly talked about so far. This gives you a chance to focus on its round shape and the texture of its peel. But what if you want to try something a little different? You could, you know, try drawing a sliced orange. This offers a completely new set of interesting details to capture, like the individual segments, the tiny pulp sacs, and the white pith that separates them. Drawing a slice lets you explore different textures and patterns, which is pretty neat.
Another really fun option, especially for kids or if you are looking for a more playful style, is to create a cartoon orange drawing. This is where you can let your imagination run a bit wild. You could give your orange a friendly face, maybe some little arms and legs, or even a tiny hat. Cartoon styles often use simpler lines and brighter, more uniform colors, making them really cheerful and expressive. Whether you go for a realistic whole fruit, a detailed slice, or a whimsical cartoon character, each approach offers a unique way to enjoy the process of drawing an orange, and that is kind of the point.
Tips for Making Your Orange Drawing Easy for Young Learners
For younger children who are just getting started with art, making an orange drawing can be a fantastic and simple project. The key is to keep the instructions very straightforward and to encourage them every step of the way. Start with the most basic shape, perhaps just having them draw a circle. Do not worry if it is not a perfect circle; the idea is to get them comfortable with making marks on paper. You can even use a round object, like a cup, to trace a circle if that helps them get going. It is, you know, about building confidence first.
When it comes to adding details or color, keep it simple. Instead of complex shading, suggest using just one or two shades of orange. For the peel's texture, they can make tiny dots or small, squiggly lines all over the surface. The goal is to make the process enjoyable and not overwhelming. Providing clear, step-by-step examples that they can easily follow is very helpful. And, honestly, celebrating every little success, no matter how small, will encourage them to keep drawing and exploring their creative side. Making an orange drawing should feel like a fun game for them, basically.
Where Can You Find More Orange Drawing Inspiration?
Once you have gotten the hang of drawing a basic orange, you might find yourself wanting to explore even more. There are so many places to find ideas and learn new techniques for your orange drawing. The internet, for instance, is full of wonderful resources. You can search for "easy orange drawing instructions" or "how to draw a realistic orange" to find countless examples and different styles. Many artists share their step-by-step guides and video tutorials online, which can be really helpful if you like to see the process in action. It is, like, having a personal art teacher right there with you.
Looking at real oranges can also be a great source of inspiration. Pay attention to the way light hits them, the little bumps and textures on their skin, and how their color changes in different areas. You can also look at drawings and paintings by other artists. See how they have captured the essence of an orange, whether it is in a still life or a playful illustration. Visiting a local art supply store or library might also give you some ideas from art books or magazines. The more you look and practice, the more your own orange drawing style will develop, and that is pretty cool.
This article has covered simple ways to create an orange drawing, starting with setting up the basic shape, then adding color, and finally putting in highlights and shading to make it look real. We also touched on different styles you might try, like drawing a whole orange, a sliced one, or even a fun cartoon version. There were also some tips for making it easy for younger artists, and suggestions for finding more drawing ideas. The aim was to provide straightforward steps for anyone interested in drawing this cheerful fruit.
🖼️ Related Images


Quick AI Summary
This AI-generated article covers Orange Drawing - Simple Steps For Everyone with comprehensive insights and detailed analysis. The content is designed to provide valuable information while maintaining readability and engagement.
Karen Kuvalis V
✍️ Article Author
👨💻 Karen Kuvalis V is a passionate writer and content creator who specializes in creating engaging and informative articles. With expertise in various topics, they bring valuable insights and practical knowledge to every piece of content.
📬 Follow Karen Kuvalis V
Stay updated with the latest articles and insights
